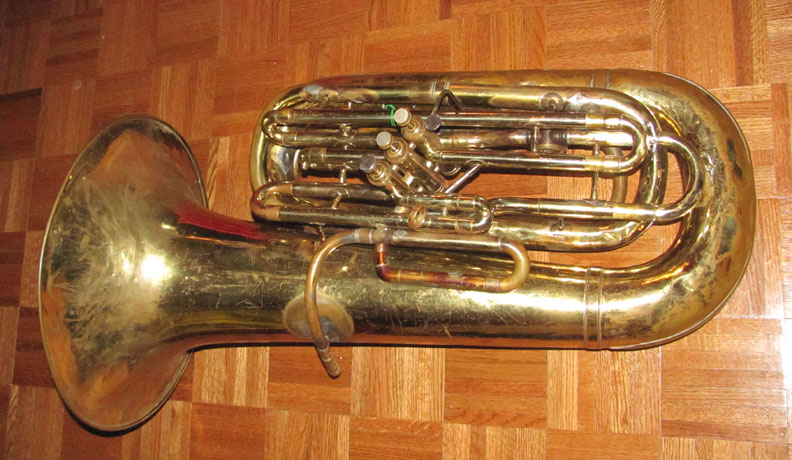
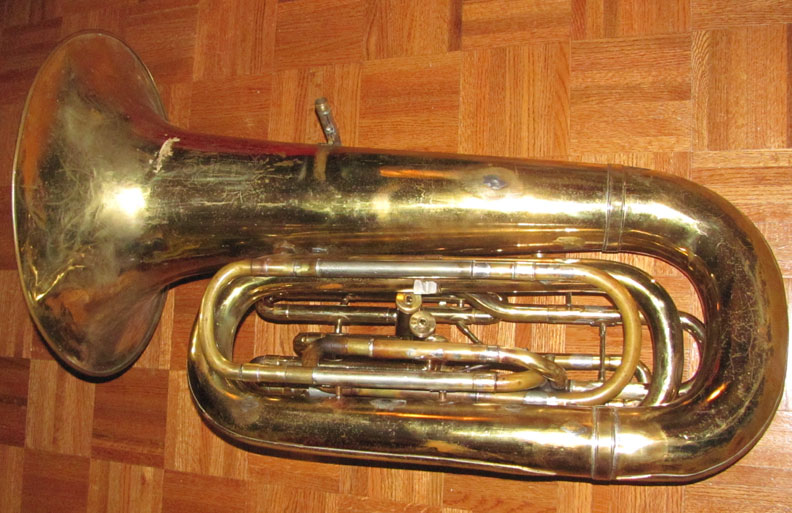
My "Hen's Tooth" CC
50 years ago I was thinking about learning to play CC tuba, but I did not have much money to spend on the idea. I knew that Walter Sear had a lot of new and used tubas in his shop, so I asked him if he had any junky CC tubas that might be within my reach. He wrote back that such instruments were "as rare as hen's teeth", and advised me to stick with BBb.
Recently I noticed that a Conn 10J (a small and inexpensive BBb top-action tuba) could easily be "cut down" to CC because it has more than enough cylindrical tubing downstream from the valve section. That alone would be a very simple project; just remove a loop of small tubing, and shorten each of valve tubing lengths to about 88% of their original values. But I wanted at least four valves, and I happen to prefer front action. A King valve block would have been ideal, but all I had on hand was a Reynolds with three pistons and an old rotary valve with approximately the same bore. If I had a larger rotary valve I would have put it on the wide side of the main slide, but the one that I had was too small for that.
It plays like a small CC tuba, which is what it is. Intonation is not as bad as some, but the open G (bottom line of the staff) does tend to be a little flat. (Harvey Phillips describes a similar issue in his autobiography; he managed to live with it pretty well.) I didn't bother to add a 5th valve because the "false pedal" notes are pretty good on this tuba.
I think with a better valve section and leadpipe a 10J could be made into a good CC tuba. This one is good enough to learn CC fingerings on, which is all I really wanted.
How to figure out how much cylindrical tubing must be removed to convert a BBb tuba to CC: A BBb tuba is sort of like a CC tuba with the first valve depressed. So if you remove an amount equal to the length of the first valve tubing on a CC tuba, that should do it. On my CC tuba the first valve tubing length is about 25 to 26 inches. But if you are starting with a BBb tuba that plays sharp, you will need to remove less. After cutting, I like to lash the parts together with string and duck tape, check pitches with a tuner, and cut again if necessary. These measurements do not need to be very precise, because we have tuning slides for fine adjustments.
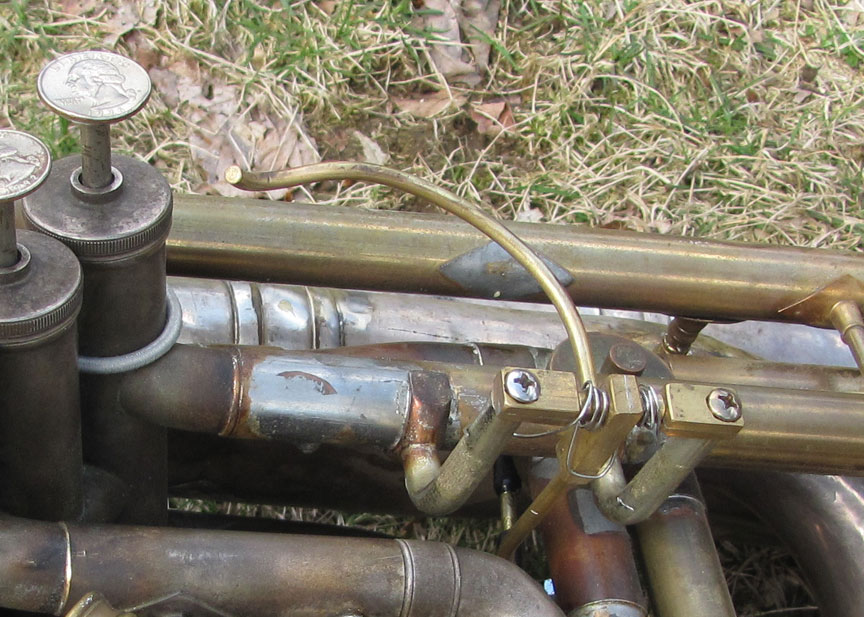
Arranging the 4th valve tubing is always an adventure if you are adding a 4th valve. It would be easy if you had the parts that you wish you had, but I always work with what I do have, instead. First, I avoid tight bends when possible, especially where water will collect. (Tight bends at the top are not so bad.) Second, I like to use tubing that is slightly bigger bore than that of the first three valves, to reduce stuffyness. Third, it is a good idea to have more than one tuning slide in the 4th valve tubing, and at least one of them should be accessible with the left hand while playing. (You need to pull out about 2 inches when you use 2&4 instead of 123, and you may want to push in some when you use 12&4.) If you can make the slides long enough it is possible to pull way out for other alternate fingerings and extended range. Fourth, I try to arrange the tubing so that air (and water vapor) go up from the valve when entering the 4th valve tubing, and go down upon return. That way, most of the water which condenses in the valve tubing will flow down through the valve to the water key in the main tuning slide, rather than accumulating in a lower bend.
Linkage for the rotary valve: There is plenty of room for creativity here. When my finger tip depresses the paddle of a rotary valve it wants to move along an arc centered on the first knuckle, i.e. the one at the base of the finger. With conventional linkages the paddle moves along a different arc, away from the fingertip. That can be annoying, especially if the arc's radius is small. I find it more satisfying to arrange for the paddle to move along approximately the same arc as does the fingertip. To accomplish that, the axle (fulcrum) of the paddle needs to be located beside the first knuckle of the finger, on an imaginary line passing through the knuckle. I managed to do that on my two BBb "frugalhorns", pictured below:

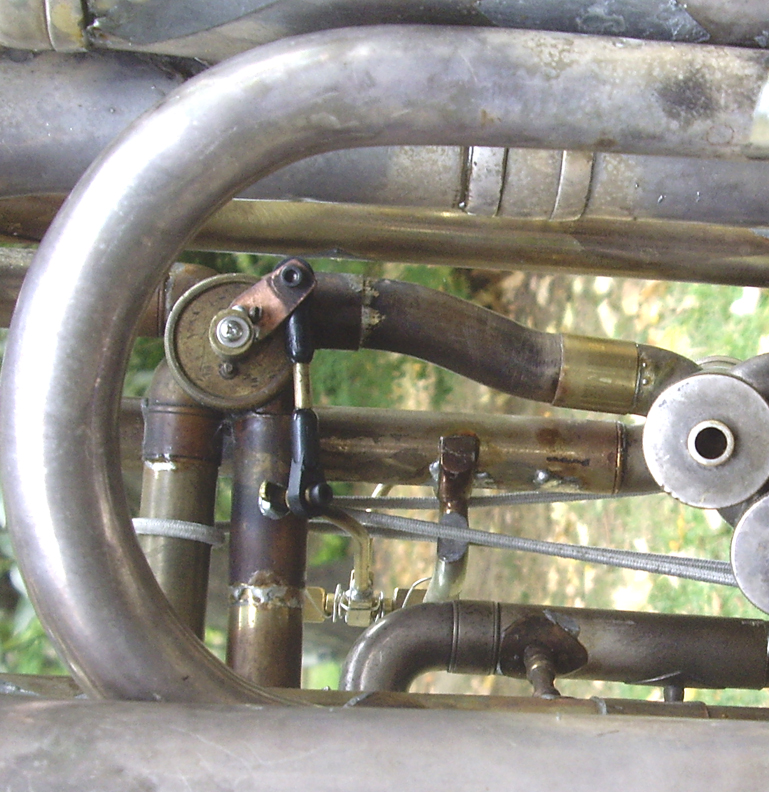
On my Hen'sTooth CC I went for a simpler arrangement. I placed the axle about 6 inches beyond my fingertip, and about 3 inches below the plane of my hand:
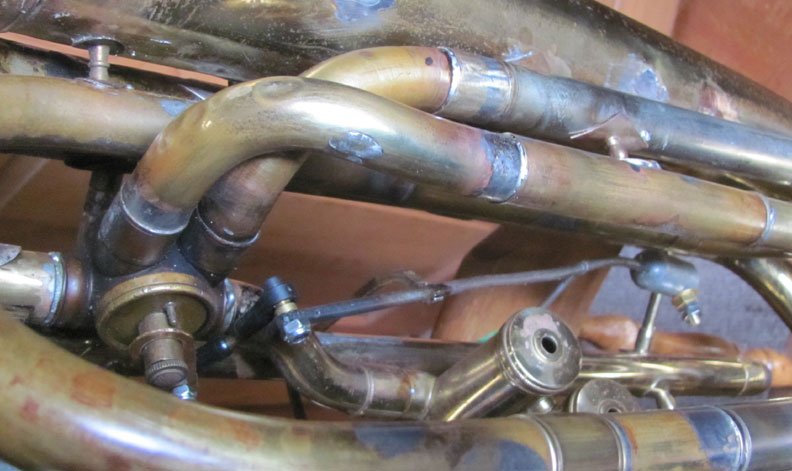
The axle in this case is just a sawed-off brace, threaded to receive some washers and a nut. A long rod runs from the axle to short connecting rod, which runs to the stop arm of the rotor, all connected with Du-Bro ball-and-socket joints. The nickel finger button is connected by another bent rod to the first rod. That's the only part that is exposed to easy damage; it is also easily repared. There is some valve clatter with this arrangement; I may be able to track it down eventually.

I always make the stop arms on my rotors longer than usual. This puts less stress on the top bearings, so they last longer. The paddle stroke length is determined by the geometry of the linkage. I like to make it the same as the piston stroke length, so the system feels like a regular four- piston valve block.